
I started painting small pieces on paper, now I am evolving to larger sizes on more sturdy surfaces, and loving it. Painting large kind of lessens the need for framing, I guess. For me, this is amazingly liberating. Last week I went to the hardware store and bought some wooden strips for my experiences on cradling my masonite boards, smiling, thinking at all the money I was saving in framing. While working on the boards, I discovered another advantage, even more gratifying: preparing the very surfaces you are going to work on, with your own hands, can be immensely pleasurable and even have a spiritual dimension. Thinking that not only the painting, but the very structure where it is placed, were built by yourself, makes it even more human and infused in energy.
Before starting, I looked for tutorials on the web and found this one, made by artist Amanda Hawkins, which was very helpful. Our process end up being very similar with just a few differences. Here's my own tutorial on how to cradle masonite boards, based on what worked for me. Hope it is useful!

1. For this project, I used a size 24' x 30' masonite panel ($3.58) and one 10 feet long wooden strip measuring 3/4 wide and 1/2 deep (about $6.50 each, the most expensive material you'll get.) You'll also need a hammer, a ruler or measuring tape (I prefer the tape), pencil, a hand saw or electric jigsaw (I highly recommend this second one), wood glue (not used by me in this first attempt, but proved useful later), sandpaper, and tiny little nails. And, of course, acrylic gesso and a brush for priming.

The wooden strip. 3/4 deep is good enough to hang on a wall, but will also fit a regular frame if you client thinks your artwork deserves better.

The masonite board and its 1/8 thickness.


3. Apply the wood glue to stick the strips into place, and reinforce it nailing the corners and borders of the masonite. Three nails in each side will do the trick. Make sure the heads of the nails are not sticking out and the surface is even, and sand off the masonite powder that will accumulate around the nail holes.

4. Ta-dahhhhh! You are good to go. (But with no blonde little head, sorry. This privilege is mine.)
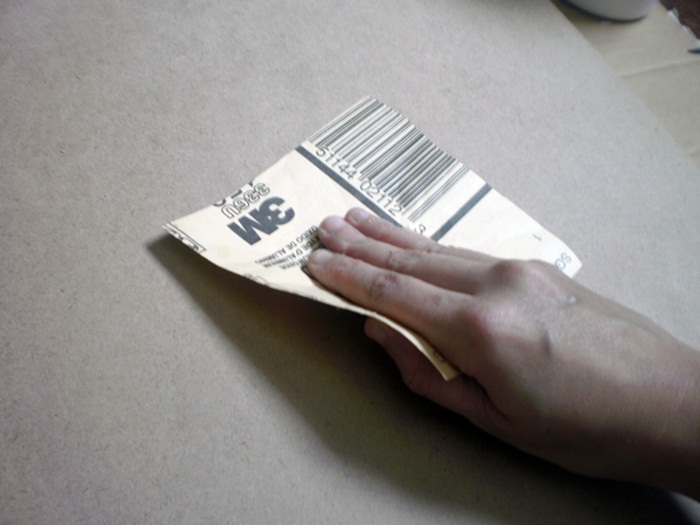
5. Now you can sand your board...


7. You may still see nail holes showing on your board. In such case, more sanding and more gesso until you make it smooth enough.

8. Also, gesso the sides to make your board uniform and nice-looking. It will also cover imperfections. Here is the board hanging on the wall, ready for the brushes!
A cradled masonite board this side, unprimed, is around $35. A simple frame, no matboard, is around $30. What do you think I'd prefer?
4 comments:
I'm going to bookmark your tutorial. Thanks so much. I may get around to doing this soon.
thank you for sharing your technique!
hi Cheryl and Tammie! i am happy for sharing my art adventures. I'm afraid I'm not a good tutorial writer tough. :P
Good tutorial. I know it's been awhile since you posted this, but if you're still using Masonite or wood to paint on, you should try out Art Boards panel gesso. It's quite a lot different from regular acrylic, thicker and it can be sanded to an incredible smoothness.
Post a Comment